Sailing: The art of getting wet and becoming ill while slowly going nowhere at great expense.

Tuesday, February 21, 2012

Dura-Plate 235


Dura-Plate 235 Multi-Purpose Epoxy is a modified epoxy phenalkamine, formulated specifically for immersion and atmospheric service in marine and industrial environments. Dura- Plate 235 provides exceptional performance in corrosive environment, and can be applied at temperatures as low as 0°F.

  Self-priming, Low temperature applicationSurface tolerant - damp surfaces, Provides salt water and fresh water immersion resistance, Cures at temperatures as low as 0°F


This stuff covers great.  These images are just 1 coat.  I will put on a second coat after a cure of 48 hours.  Very forgiving, cures a little slower below 32 degrees but nothing that will throw you off.  Bonds well, hard as nails. The only down side is it is VERY expensive.  Almost $80/gallon.  I have gone through 3 gallons in this refit.  But as a primer coat I don't know if it can be beat.  We will see in the coming years if it holds up well.


Monday, February 20, 2012

Cockpit Lockers


 This past weekend only left me a couple of hours for the boat in between soccer games, horses, museums and dinners out.  i had hoped to get a coat of paint in the lockers but really only finalized the prep work.  I epoxied in the final pieces in the stern locker and then fillets and tabbing were installed. 
 
There was a large piece of wood running vertically along the interior edge of the rear cockpit.  It looked like something really beefy was mounted on it or through it.  It had been patched and painted many times but i could see no real reason structurally for it to be there and it was in the way of where I wanted to install the engine control panel.  So it had to come out.  It was epoxied in quite well and took some persuasion to get it out (pry bar).  when it did give up its hold it revealed a bad patch job on a very nice oval opening in the fiberglass with 4 screw holes. 

My guess is an old set of engine controls for the original Volvo that was in the boat.  I can fill and patch it properly now when i redo the cockpit.  I removed the controls from the starboard lazerette and uncoupled the wiring harnesses. 

It is now in the basement and I will make a backing box to protect the rear of the panel after I install it in the wall of the stern locker with a spray shield on the front. 

Finally I filleted and tabbed in the last new support for the fuel tank in the port locker.  Now for some final sanding, prepping and cleaning before a coat of paint goes on, weather permitting.

Tuesday, February 14, 2012

Battery power

The beginings of my wiring diagram.  I have decided to have the Main starter battery (BAT 1)on the port side and the the House batteries (BAT 2), 2-6 volt golf cart, deep cycle, on the starboard side.  This was decided based on available space and weight distribution.  The diesel tank will go on the port side as well.  The diesel tank full will weigh about 70 lbs and the starter battery weighs in at 60 lbs.  The two deep cycle 6 volts on the  Starboard side weigh 63 lbs a piece.  The 6 volt batteries are a lot taller than the 12v starter batter and I can just about get them in the lazarette down low under the cockpit sole.


 By moving the control panels away from the batteries I have created some interesting issues with cable runs.  The biggest issue is with the batter selector switch which is tied to the main panel versus being separate.  The primary battery cables are still AWG 4 calculated at a 3% loss and the runs are only about 10' in length. All of the interior lighting and exterior lighting work out well with this location but the instruments that need to access the cockpit have a longer run.  To get the battery cases in I also have removed the engine exhaust pipe that was questionable if it needed replacement, until i tried to remove it.  It definitely was just a while away from rusting out connections.  The only bilge pump and hose was also removed to be replaced with all new.


I fashioned some risers out of treated 2x material that are glassed to the hull and will be painted with epoxy.  The shelf/platform is made of marine grade ply that will also be epoxied.  The batteries will go in individual battery boxes and the strapped down to the platforms.  The original assembly was floating in the locker and not very secure.

Monday, February 6, 2012

Beginning of the End


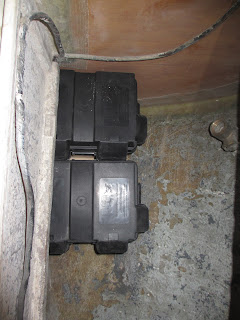
Installed the main electrical panel in the new door/box.  Need to add the 12V plug but did not have the correct size hole saw.  The objective for the weekend was to remove the last of the electrical wiring, document the current battery and switch set up, remove the batteries with associated wiring and begin scrapping lockers.  The wiring came out with only a little fight.  The batteries removed easily enough as did the plastic battery trays.  I will replace with fully enclosed battery boxes.  The trays were mounted on some 2x material that was supposed to be glassed to the hull.


I was able to pull them off with my bare hands.  The wood was dry and beginning to rot but the fiberglass tabbing had completely failed.  Gravity was the only thing holding the batteries and base in place.  My trusty little 1 gal shop vac finally gave up the ghost after a couple of years of dutiful service.  So I was limited on how much old paint I could scrape off before the whole thing was a mess.


I took apart the old Yanmar engine control panel which at purchase time did control the starting and stopping of the engine and gave a pretty reliable RPM reading.  I always thought it was a bit cumbersome to lift up the starboard cockpit locker and reach back underneath to access the starter and controls.  I took some measurements and made a decision to relocate it to the rear of the cock pit well.  The wiring harness would reach and I could recess it into the fiberglass wall of the well or flush mount it and cover with a splash guard.  I will price out both options as now is the time to do this and restore the locker to useful storage.  This locker always had to be left somewhat clear to be able to access the controls.


In poking around in the stern locker to make sure the controls panel would fit I found one more area of rot that had to come out.  It was obvious that any water getting into the stern locker was going to pool at the low point trying to get into the bilge. There was no drain hole so it rotted out the plywood instead.  I will fit and tab in a piece of new marine grade plywood and include a drain hole at the low point.  I also took a look at the rudder post.  This looks like it has been weeping for a while.  I will have to try and get that apart and repack it assuming it is like a stuffing box.  I was thinking of installing an access panel in the cockpit sole to gain access to the prop shaft and stuffing box.  I might want to look at putting in another to gain access to the rudder post as well.


Thursday, February 2, 2012

Mechanical and Electrical

This past week I reinstalled a the fourth and final set of berth slats along the port settee. Picture to come later.  It was not without it's problems.  These slats had to be shortened on the ends where I installed a new bulkhead.  A month ago before refinishing them I had cut off the 1- 1/4" needed on the ends.  Turns out in getting them off the boat I must have flipped some of them over (3 out of 6) end for end and cut off the wrong ends.  Reinstalling them proved rather difficult as none of the holes or pre-bends were lining up.  To solve the problem I cut an additional amount of the other end of the 3 that were wrong and 1 that was OK but would have looked odd being longer.  Now the first and the last are the correct length and the four in the middle are all equal but shorter than the rest by an inch.  I will need a throw pillow there.

I have been mounting the hidden cleat plates under the bow and stern seat of the dinghy.  The builder would normally just screw through the top surface.  This way is a lot more work but really looks good with no exposed fasteners.  I came up 4 screws short yesterday but then I will be done.  I still lack 10 silicon bronze #10 1" flathead slotted screws for the oar lock plates.  I can only find them in a pack of 100.  That and 2 oars and we will be ready for a launching.


 I finally got up enough courage to cut into my new electrical panel to insert the switches.  It went very well.  I will add a 12v outlet and then get ready to mount into the boat.  I also came across someone selling old discontinued product and picked up two vent cowls for the dorade boxes.  The are the rubber kind and not the metal but $25 vs $400 will ease that.  He also had a very hard to find 4" round deck chain pipe.  They only make small 1-1/2" ones now.  Single handed it will be easier to feed the rope/chain rode into the chain locker this way.