Sailing: The art of getting wet and becoming ill while slowly going nowhere at great expense.

Wednesday, July 18, 2012

Safety First


 My job this weekend was made easier by my helpers.  The little first mate was able to squeeze into the stern locker to put a wrench on some bolts that I just could not reach.  I hope we have them torqued enough to be water tight. 
 I had another friend come over in the afternoon to help with all the stanchion bolts.  This required someone on the outside preventing bolt from turning while I was on the inside setting backing plates and nuts in place.  Very hot work but we got everything ratcheted down to a point was I was comfortable with.

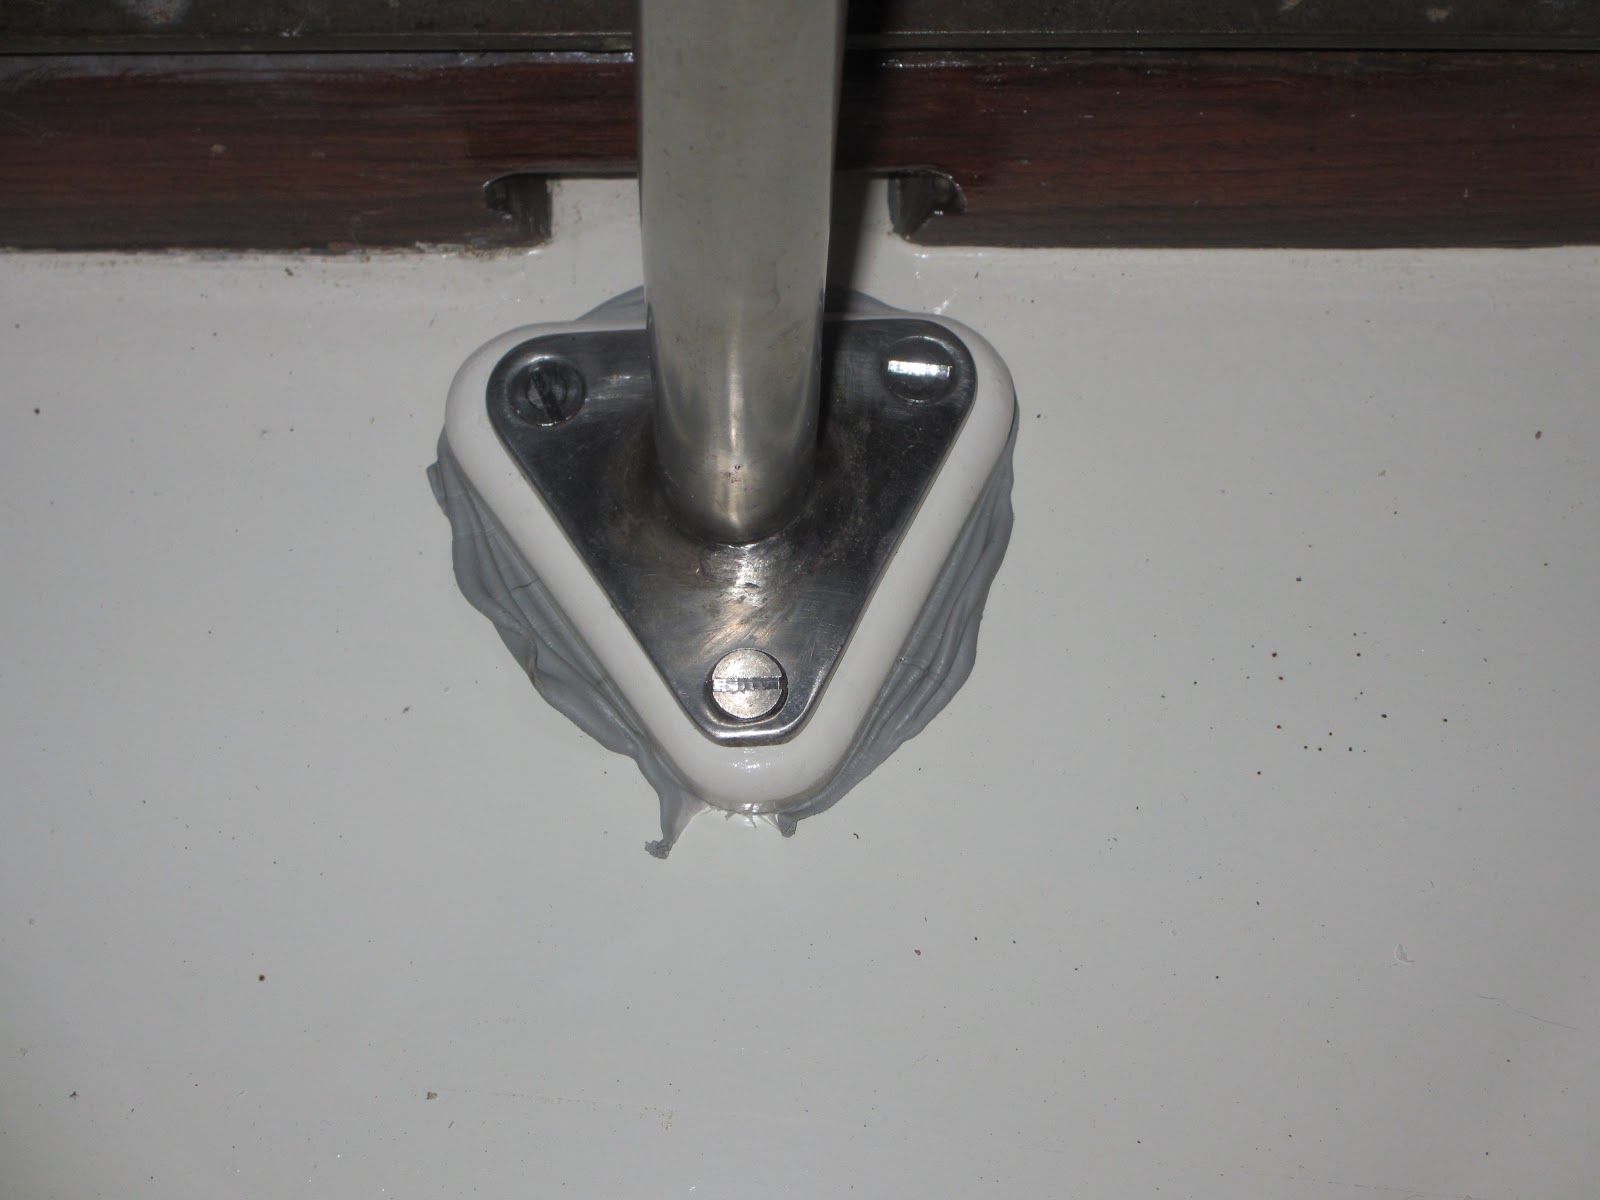
 All of the deck plates were heavily layered in butyl and a little extra around the bolts.  Nothing on the backing plate so I don't conceal any possible leak.  Everything is very solid.  My only disappointment was on the bow pulpit mounting plates.  3 out 4 bolts are fine.  The 4th on either side I drilled into a hollow stringer.  I plan on just setting that bolt in some epoxy with the bolt lathered up in Vaseline.  Once it kicks I should be able to extract and re-tighten the bolt which will now just be a screw.

 I celebrated all of this success by installing the new lifelines that I received from Rigging Only.  I sent in my old ones so measurements were not an issue.  The old were 1/8" SS covered in white plastic.  They were probably original and the white coating was all cracked and peeling.  The new ones are all 1/4" Stainless Steel.  Very nice and shiny and expensive.  It is a safety feature so I can't complain too much but this old boat only has a single life line at a bad height (24").  Current convention is a higher stanchion (30") with double lines.  This would have necessitated all new stanchions and modifications to the bow and stern pulpit.  Too much of an investment for this old boat.  It feels really good to have the lines back on.  More complete.


 Lots of good butyl squeezed out.


Thursday, July 12, 2012

Lucky Guy (Long Story)

The 100 degree days finally broke this week and it has been rainy and very humid.  I have been occupied all week in the basement which is where the mast resides.  I received the new VHF and accompanying whip antenna with coax cable with plans on making a quick installation on Monday after work.  I planned a new hole in the bottom of the mast to make a nice clean installation.  I began drilling a 3/4" hole with a forstner bit at a slight upward angle at the base heading towards the top.  After drilling 3 inches into a 6 in wood mast and still not punching into what I perceived to be the hollow part of the mast, I knew it was not going to be a quick night.  I did not want to keep drilling so I changed tacks and decided to just widen the existing hole for the electrical wires to add the coax.  This I was able to do as my entry point.  I then took my fish tape and began to fish up from the bottom to the top.  I could only get half way up the mast and kept hitting something.  This seemed to be where the spreader plates attached to the mast on either side.  I removed the through bolt and all the screws to eliminate any obstruction.  Still no go.  Bumping against something just under half way up, right at the spreaders.

 I surmised (correctly) that there must be some blocking in the hollow mast at that point for strength and there probably is only a wire way through this that I might never luck into with my fish tape (correct).  So, I took advantage of the wires I had run in the mast about 10 years ago.  I pulled out the wires for the running masthead light and pulled in two new #14 (pos & neg).  I did this because the old wires were in a molded sleeve and I felt I would need as much room as possible for the next pulls.  With these new wires run and tapped off out of the way I prepared the next run from the mast top to the base for the anchor light and VHF coax.  Again, I used the existing wire run of two #14 in a plastic sleeve (like romex) that I had run 10 years ago reasoning that a new run of #14 wire would make it easier to pull in the coax at the same time.  More wire, but could be an easy fix to my little problem.  I attached the two new #14 wires and the new coax to the old wires at the mast top by twisting the bared wires together and taping the coax to the side a little further down the line.

My younger first mate was feeding in from the top and I was pulling out the bottom.  This went well till there was a little snag (around the spreaders) and I pulled a little harder.  The first mate informs me the black (coax) is not moving any more.  No problem I think, probably came off and I just need to pull it all out and start over.  Then she says the red and yellow wires are not moving.  Oh no.  I go up and pull the new wires out very freely.  Everything had come off as the old wire broke.  I now have no way to fish anything through the mast.  I had been at it for 3 hours so decided to call it a night before I started doing things I would regret.

The next night I decided to try to suck a pull string through with a very strong shop vac.  I taped off all the holes and made a gasket out of butyl to seal the vac hose against the mast as tight as possible.  I tried sucking that small string with all sorts of attachments, plastic, bags, fluff through that mast.  I tried top down and bottom up.  No go.  It would all suck inside based on the vacuum but never come out the other end.  It was binding up in there somewhere.  I tried for a solid hour with different degrees of failure.  Ready to quit, I decided to try going through the opening at the mast head light just a couple feet lower than the spreaders.  Eliminating a good third of the mast to suck through.  Still no go.  As I was cleaning up all that I tried using the fish tape again this time from that mast head hole thinking I could get better control with angles and pitch to find the now vacant hole through the blocking.  I twisted and bent that wire for a solid 30 minutes and was rejected at every attempt.  In disgust I rammed it in hard and walked away.  I took only two steps before I realized that I didn't feel any resistance that time.  I scrambled back and gave another tentative push on the fish wire.  It bound up for a split second then went through.  Wow.  I kept feeding till it bottomed out at the top of the mast.  Now I had a 1/4 inch hole to snag and pull out an 1/8" fish tape.  The elder first mate suggested a crotchet needle which was supplied by the younger first mate and I had my fish tape through the mast.  Well actually only halfway through the mast.  I still needed a feed from the masthead hole to the base.  But that would have to wait for another day. 

The next evening I began by trying to get the fish tape up from the bottom to the masthead hole.  I tied a piece of string on the tip so it would be easier to grab.  I snagged the string through the hole (crotchet needle again) and tied it off to the string to the top.  went back to the base and pull it out.  I now had one continuous pull string through the entire mast.  I now changed tacks again and decided to pull it up from the bottom rather than down from the top.  This should be an easier pull as the bottom hole was now larger.  Plus the other way already failed once. I would just have to redo the top thimble where the coax attached to the antennae.  I attached the 2 #14 wires and the coax at staggered intervals of one foot and attached the pull string to the lead #14 wire. I fed from the bottom while the  elder first mate pulled on the string until we got to the spreaders.  No go.  Binding up again and I was too afraid of having it break apart.  I backed it all out and decided to try just one #14 with the coax and another pull string.  If this went through then I would probably have an easier time with the new pull string and only one #14 wire on the second pull.  The first pull went through with only a little binding.  The second pull went through with no issue.  I now had all new wires and a new coax pulled through the center of the mast.  A feat they say is very uncommon.  Fortunately I found this out after I had done it or I would have probably found another way.  According to the wooden boat forum: 

Box spars often have any internal wires stapled to ensure they don't get in the wrong place during the initial glue-up... There will likely be stacked up blocking in way of the spreaders and at the butt and head, there will most likely be a dado cut in these blocks that the old wires/ tag line ran in, you have to be one spectacularly lucky guy to hit that with your fish tape, but stranger things have happened! It also would not be the first time one section of the side or front of the mast came off to put this kind of situation right...The vacuum trick works better if you tie a wad of fiberglass insulation or the like to the end of your tag line. Use very light line, and then pull your bigger, tougher actual pull line using that...Assuming you are that kind of lucky guy! Let us know how it all works out... 

Guess I am one lucky guy !!  Now all I have to do is fill and patch the holes and wire up the antennae and lights.

Thursday, July 5, 2012

A little electrical

 I had a couple of hours on the boat on July 4th now that we are back at home.  I had to stop once the the temps got over 85 in the cabin.  I made the first dozen electrical connections and mapped out my next steps in wrapping up that side of the electrical.  I figured out what additional connectors I need to order and decided that I would change my mind and put the VHF at the electrical/nav station rather than at the companion way steps.  This keeps it all together.  These images are from my cell phone. Not the quality of the PowerShot.


The unit I ordered also has a GPS connection so I can show SOG, Heading, etc on the screen.  I needed a very small compact unit to fit in the small space I had allocated and settled on the Standard Horizon GX1600 Explorer.  Lots of features but a very small footprint.

Monday, June 18, 2012

Engine Controler

 After cutting in 50 new holes I had the confidence to cut one very large hole into the 43 year old fiberglass cockpit.  This new hole allows me to relocate the Yanmar Engine controls from a box under the starboard settee to the open cockpit.   


The installation was pretty straight forward.  I cut out the hole, marked the screw holes and drilled them out.

  I had an old aluminum box that I used as a rear shroud to protect the wires on the back side.  I attached that with butyl and the screws from the front plate.  The wiring harness was long enough to reach it's new home and reconnected everything.

 A new shield has been made and now will cover the old Yanmar B style controllers from splashing water and rain.

I also installed the shore power plug into it's old hole.  I don't know if I will use it again but it is there if I need it.  I will put the newly painted vent cover back on the other locker but need to get some mosquito netting first to deter any spiders, etc.

Re-assemble

 It feels good to finally be putting stuff back on the boat rather than removing it.  I have cleaned and polished all the lifeline stanchions and the bow and stern pulpits.  I have made all new mounting plates and backing plates for all of the a fore mentioned pieces.I matched each plate with it's hardware and marked and drilled holes so they would line up properly.  I used those mounting plates to mark where to drill into the deck.  I fussed around with the locations for the stanchions to get them spaced properly.  Even spacing did not work out well so they are a little closer together at the stern and farther apart forward.  It was time to make some holes.  
In my nice new deck I proceeded to make 50 NEW holes in her skin.  The bolts holding down all that hardware are 1/4-20's so I drilled over-sized, 5/8" holes with a forstner bit.  Drilling through the top laminate and the core and stopping at the lower laminate skin.  I then mixed up some thickened epoxy and injected, via a large syringe, the epoxy into the holes filling them up to the top.  About 3/4 of the way through the holes the epoxy left in the cup kicked off and I had a smoking mess.  I made up a new batch and finished the remaining holes, trying not to over fill or under fill.  When all of the holes had been potted and kicked, I spent the next hour washing the entire boat again from bow to stern.  This would be the last time I can do it until all of the bolts have been set in place.


 There were a couple of holes where the epoxy swelled up and crowned.  I lightly ground those down and then began to drill 5/16" holes down through the center of the epoxy plug all the way through lower skins.  This was followed by counter sinking the entire 5/8" hole to allow more butyl to fill the void.  Now if any water should make it's way down the bolt it will pass through to the cabin without soaking the core and ruining all my hard deck work.  It takes a couple extra steps and is time consuming but it is the only way to guarantee the core will not fail again.  I spent a lot of time shortening all of the bolts.  they were all a half inch too long and since I was using acorn nuts for a nicer finished product in the cabin I had to cut them all off.


The bow and stern rail are all mounted in lockers so regular ss nuts can be used.  I then dry fitted all the backing plates, nuts and washers.  The final attachment with the butyl will happen when I have someone else to be on the outside to prevent the the bolt from turning while I tighten down below.  When using butyl the bolt can not turn or it compromises the seal.


Sunday, June 10, 2012

Cockpit Painting


The cockpit finally got painted.  This is the only part of the boat that id sprayed.  I rolled and tipped the rest.  In the future I will spray project when ever possible now that I have the knowledge and skills required to do a good job. 

 The most difficult part of this is reaching in and around because I could not step or stand where I needed to be.  I can now remove the plastic tenting and give her a good wash down.  I may just lift it up like a skirt to get some air flow.
I am also painting all of bases for the stanchions and the bow and stern pulpit.  I would like to get all of those mounted next weekend when the girls are away.  I can drill, and back fill with epoxy then re drill and mount with butyl.


 Don't think I can tighten down unless I have someone helping on the outside.  Still need to make the backing plates for the bow and stern but that won't take too long. 

Wednesday, May 30, 2012

Odds and Ends

 Been confined to the house so no actual work on the boat for the foreseeable future.  Been working on some items that are off the boat.  I cleaned and polished the last of the stanchions and the bow pulpit and stern rail.  I ran new wires for the forward navigation lights through the bow pulpit.  I took apart the two nav lights polished them.  They were originally chromed bronze but were pretty corroded and when I buffed and polished only the bronze was left.  I can't seem to keep the bronze finish shinny.  I have used Brasso but it starts to turn green within days.  Going to try a recommended product "Wrights copper cream" to see if that will help.

 The lamp holders were corroded to a non usable state and the ceramic isolators disintegrated.   I ordered new Perko lamp holders and plan on ordering some LED bulbs, but may just use the regular bulbs and put the money into an LED anchor light which will get used more and for longer time periods.  The lamp holders fit nicely into a fire wall grommet that we had at work and they are all put back together.
I ordered new wire crimpers and will make the final connections soon and reinstall.  I also ordered a new bilge pump, 2000 GPH but really only 1300 GPH at the lift I have.  I have some primer paint for the cockpit that I would like to spray and topcoat with Toplac but I need a couple of good days in a row and my time is taken with other matters at the moment.  I painted the floor boards of the cockpit with an epoxy primer then a coat of Interdeck. I sprinkled some silica sand when wet.  When dry I brushed off and re coated with Interdeck.  Came out OK, not too abrasive.  I think I will do that in the bottom of the dinghy.