Sailing: The art of getting wet and becoming ill while slowly going nowhere at great expense.

Monday, July 18, 2011

Galley Work


I thought I was done with bulkhead replacements. I switched over to working on fixing up the Galley cabinetry and only planned on some minor touch up. Of course once I started to remove things to get at the cabinet work the hidden stuff all crumbled and replacemrnt was the only option. The issue was I had not planned on this and was running out of marine grade plywood.

This technically is not evern a bulkhead other than it does run to the underside of the deck but really just forms the side of the galley cabinet. The PO had covered up most of the ills with some P-lam that once removed showed a lot of bondo work trying to extend the life of bad plywood. I was able to salvage the stove enclosure which was still good and all the hardwood trim but the rest and it's failed tabbing had to go.

Once removed I made cardboard templates and tried to fit them onto what remaining 3/4 marine ply I had left. At $100/sheet I did not want to buy another. I squeezed it onto two pieces whose joint can be hidden behind some seat supports. Not ideal but not really a structural member either. To finish it off I really need a piece of 3/16 ply veneer to cover it all.

I also did alot of work repairing all the cockpit seats/locker covers that had failed. The repair was with thickened epoxy and fiberglass to strengthen and some SS corner braces. The teak needs to be cleaned and sanded on all the pieces and the least bit of teak left in the cockpit but that will come later. Big news this week was the arrival of the bow rollers. More on that later.

Friday, June 24, 2011

Tabbing


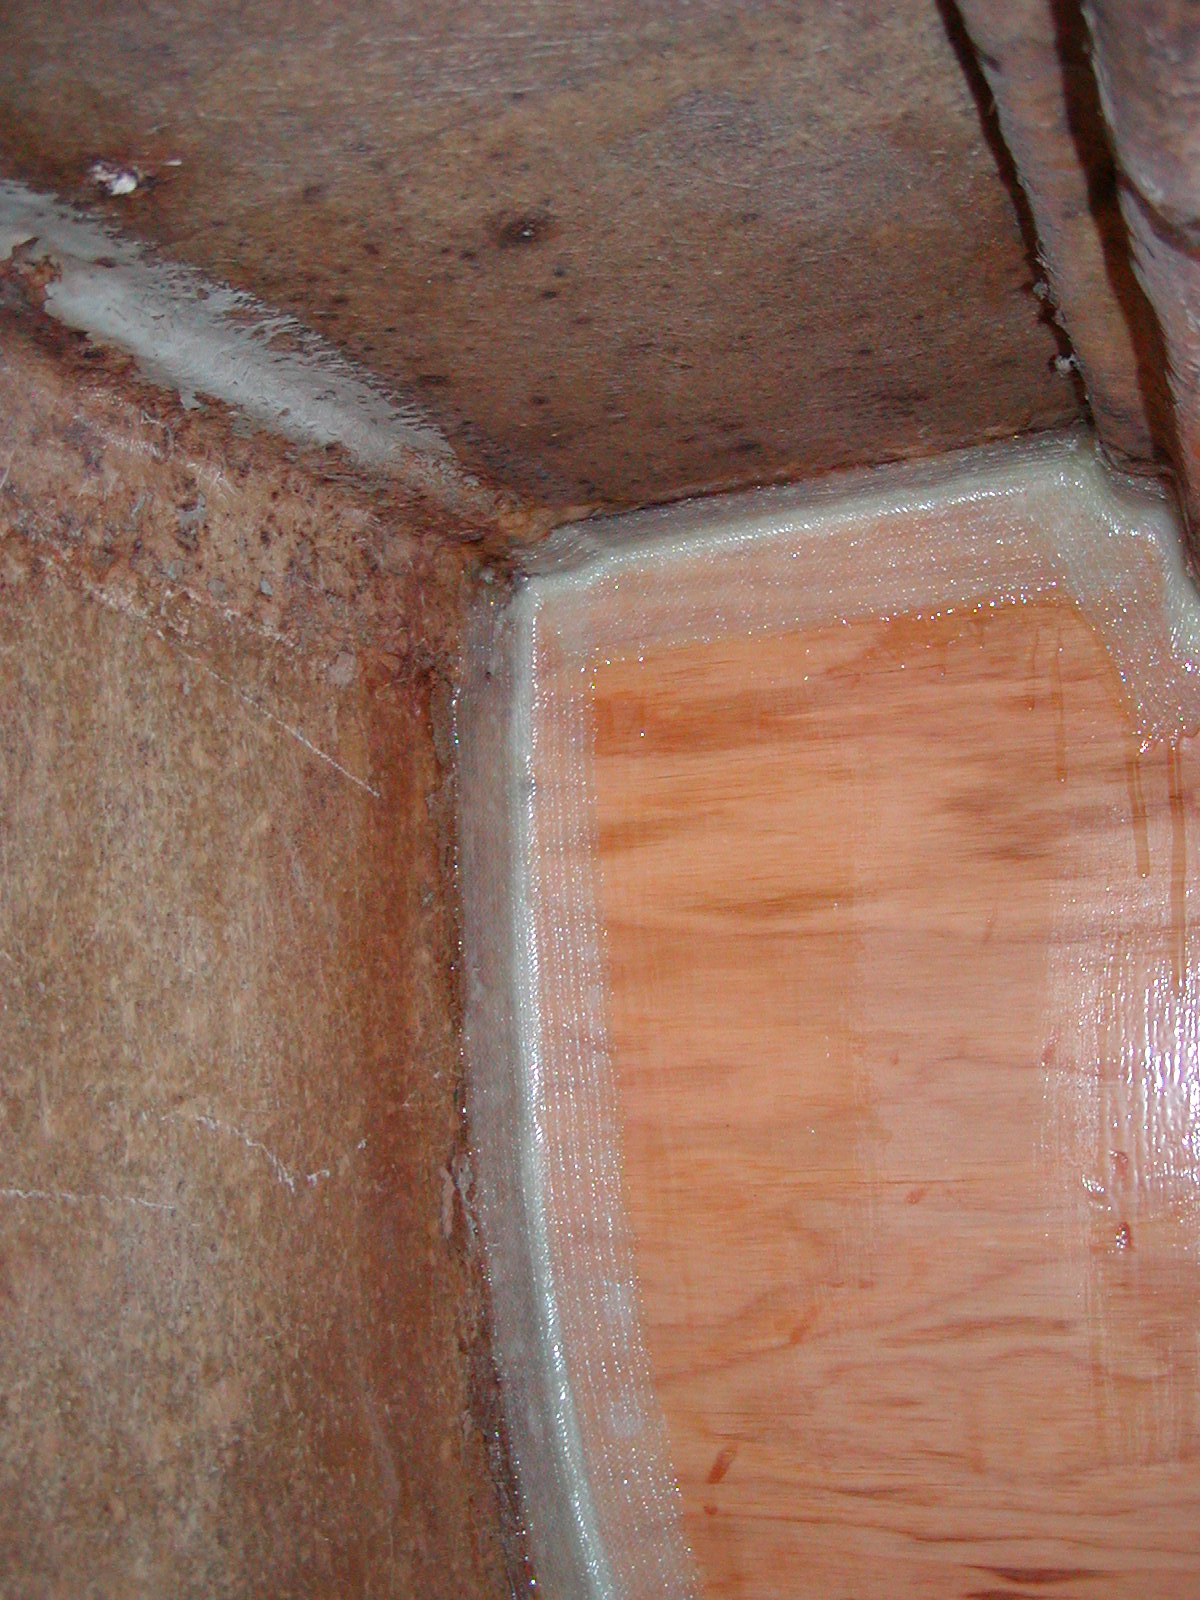
Starting in on the tabbing this week. It has been very hot and uncomfortable so I have not had too much time aboard. Tabbing is the process of overlaying the fillets with strips of fiberglass to adheare and strengthen the attatchment of the builkheads to the hull or deck. The joint is cleaned, sanded and prepped as needed. The strips are cut to length and then saturated with neat epoxy resin. Once they are fully wetted out you wet out the joint and apply the fiber glass. A disposable brush is used to help it adhere and apply more epoxy where needed. When you are really good you can apply successive layers when the epoxy is hot (kicked) but not cured to get a better bond. Otherwise, like me, you wait till it cures, come back and whipe off the epoxy blush with solvent and sand down for the next layer. Everyone has their own process but I like a fillet covered by a 3" strip and then a 6" wide strip of biaxial fiberglass cloth on the primary structural joints. Minor cabinetry elements I will glass in with only one layer over a fillet.

Monday, June 20, 2011

Final Bulkhead


This weekend allowed me to finish up the bulkheads and cut to fit the final bulkhead that I will be replacing. The others were sealed with epoxy and sanded down. It is 3/4" marine grade plywood but a coat of epoxy, especially on the end cuts will help a lot. These were all set and filleted in place. This week I will will tab them in, both sides with 16oz bi-axial fiberglass cloth 6 " wide.

The final bulkhead which replaces the old one that had the ice box access has been cut, trimmed and fitted. This week I will seal with epoxy but not put in until all the other tabbing is done to allow access. The cut out is 16" x 16" so in theory i can get in to set the back side with fillets and tabs when set in place. It came out quite well with a nice rounded over edge on the cut out. Always risky using a router on plywood but the marine grade was a lot tighter than regular.

The final two partial bulkheads are not really bulkheads at all. They are part of the galley cabinetry support. They have delaminated but I will just fix and apply a 1/8" veneer to clean up.

Thursday, June 16, 2011

Back Inside: Bulkheads


Continuing on the inside cabin reconstruction over the last two weeks. The starboard side bulkheads and engine compartment have all been roughed out of 3/4 marine grade plywood. This weekend I will start tabbing them in after sealing with a thin coat of epoxy. The final bulkhead is roughed in but I won't be able to fit until the others are tabbed in to get a good fit. This last one will have a large center section cut out to access the area for storage but also allow me to access the backsides for tabbing. I could get at it from the Ice box lid above in the cockpit but I would need a longer arm. The thought is that even tough I removed the inadequate built-in ice box, I may use this open storage space to be able to slide in a conventional cooler that can be accessed from the cabin or the cockpit. From the cockpit you would have to lift two lids but it will keep thing colder, longer.

The other aquisition this week was a wonderful piece of Sapele, a more readily available Mahogany substitute. Just as dense with some exotic grain but a little bit less intense in color and pattern. The piece I have is a solid 2 inch thick, 14" wide and 30" long. This will be my new bow platform. This boat has never had a bow roller platform or a bow roller for that matter. I plan on upgrading all the ground tackle as it only came with an 8 pound Danforth. On the platform I plan to carry a 22lb Claw (Bruce) and a 35lb CQR. I have laid it out on a drawing but now really need the actual rollers and anchors to finalize before cutting. Unfortunately ground tackle is not cheap so i may spread the $1,200 over a couple of months to soften the blow. When I am done it should look something like this:

Tuesday, May 31, 2011

Final Paint


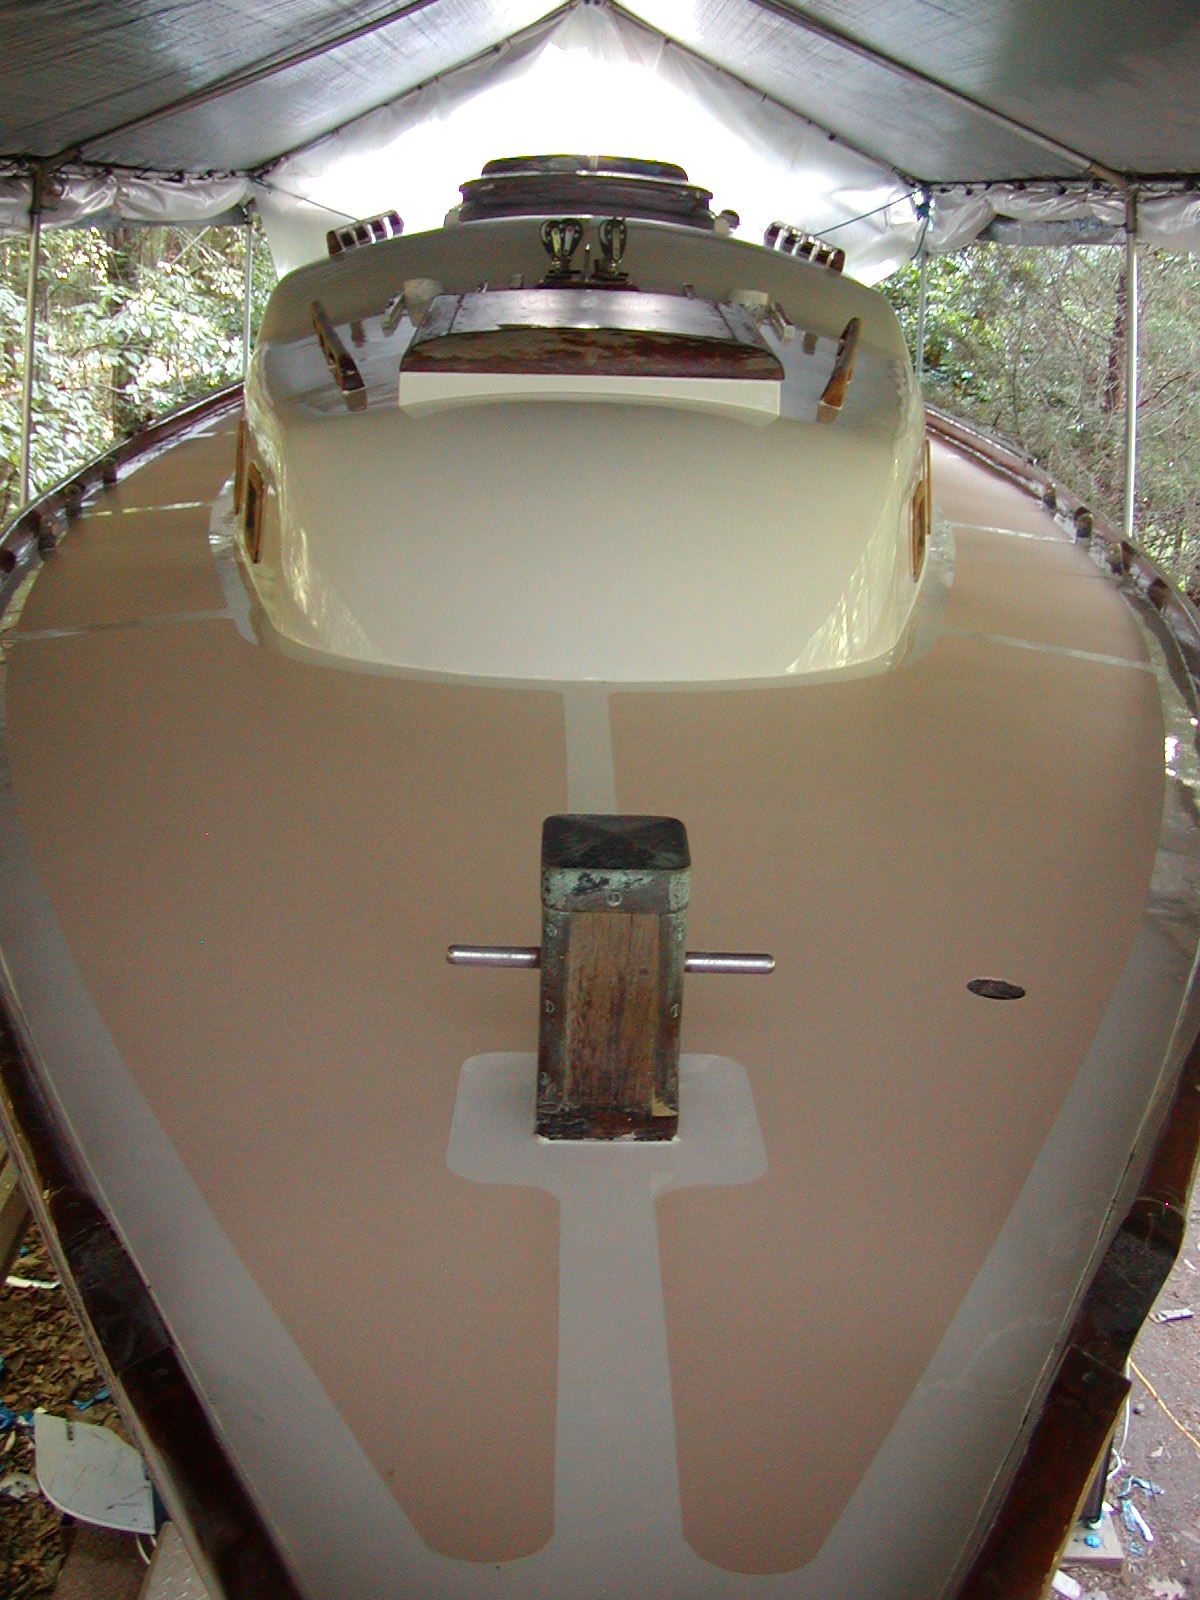
The final applications of non-skid paint on the port and starboard sides and the the entire bow area. I think I will ad some around the mast area at a later date but want to see where that will go based on activity around the mast. I will let everything cure for a week or two. This is a huge milestone that closes the chapter on an entire redeck and recore. This boat used to be covered in teak decking which was attached with 2,000 screws. This allowed water to migrate down into the core that is sandwiched between the two layers of fiberglass and provide strength without too much weight. My deck after sitting under cover for a year had dried out enough for me to realize I had a very spongy deck which I almost put my foot through. Very bad.

The entire deck had to be removed. With all the teak gone, the thought was to inject epoxy into the 2000 little holes and let it stiffen back up. This would add a lot of weight up high but I didn't think it would be that bad. After the first $100 worth of epoxy was injected and I had only covered a 2 square foot area, this was proving to be a bad plan. A little research indicated the only way to do the job properly was to cut the entire top layer of fiberglass, 1/4" thick, off. This then exposes the core and it can be removed. This I did saving the skins to relaminate back on. The core was just mush and I relized that injecting all the epoxy I could afford would not have fixed the problem. New end grain balsa was set in with epoxy then the top skins were set back on with thickened epoxy and held down with weights.

There were still some voids that were filled from the top by injecting epoxy into old and new holes and lots of sounding with a hammer to make sure everything was solid. Then the seam where the fiberglass skin rejoined had to ground out and widened then infilled with fiberglass and epoxy layers to strengthen the joint. Then the fairing and filling started all around. This took the longest time (2 years) as it is very labor intensive and very boring. You can never really be done with this part as there are always areas that could be better. Then finally it is prime, sand, wash three times, paint 3 times, then mask and paint the non-skid. Looking back over the pictures it looks a lot easier than it was. Going to take a break and then go back to work on interior. Have 3 more bulkheads to replace then paint the insides and bilges.

Monday, May 23, 2011

Painting Curve


The learning curve for painting with a single part LPU paint is vertical to say the
least. There is no correct formula for how much brushing liquid (thinner) to add for the roll and tip method. It is based on temperature, viscosity, humidity and which way you hold your tongue when mixing. My experiments on a piece of glass looked perfect. The first application on the primed boat was a disaster.

I sanded the entire thing off the next day and restarted all my testing and mixing. I kept a better watch on the temp and humidity. A better job of washing, dewaxing and cleaning. The next time I was faster, being able to keep a wet edge was a challenge when doing it all by myself. The first coat has some runs and misses but was brought back into compliance with a light sanding before the second coat. This is where I wish I had not used the gray primer. Covering in white would be tough. Sand, wash, repeat. Final wash with acetone and then an additional round with the tack cloth. The second coat went on better than the first after a couple of scary areas were immediately redone while still wet.

The next day it looked pretty good and the tape was removed ready for the application of the tape for the deck surface areas to be masked. Cleaned, washed, tacked, etc. Then two days of deck painting, trying not to drip sweat on the surfaces. Finally with all the tape removed and it looked like I had graduated LPU school.

No, it is not perfect, yes there are a couple of runs in out of the way places and some mysterious fish eyes. But it looks great from 5 feet away and a looks like a 10K paint job from 10 feet away. I will finish up this weekend filling in the non skid areas with a tan colored Interdeck mixture.

Preping the Prep


With all the gear removed from the deck and cabin top, there was no soaked core but still some minor crushing. All of the holes have been filled and the low spots faired out. Lots of sanding, taping and cleaning, washing, sanding, fairing, washing, etc.


First of 2 coats of high build primmer were pretty much sanded off, washed, sanded, washed, etc. The third coat has become the base for the new paint. It feels smooth but each time I go over it I find something else. When you put on the primer it is glossy and the imperfections are evident. After it has dried it is a more matt finish and the errors are less visible, making it harder to go back and find and repair. Very dirty work using the gray colored primer.